Commands
Pay
Pay, as the name suggests, allows developers to build native payment experiences directly inside of their mini app. At launch, WLD and USDC.e will be supported. Payments are easy to use and only have three simple steps.
- Creating the transaction
- Sending the command
- Verifying the payment
Setup
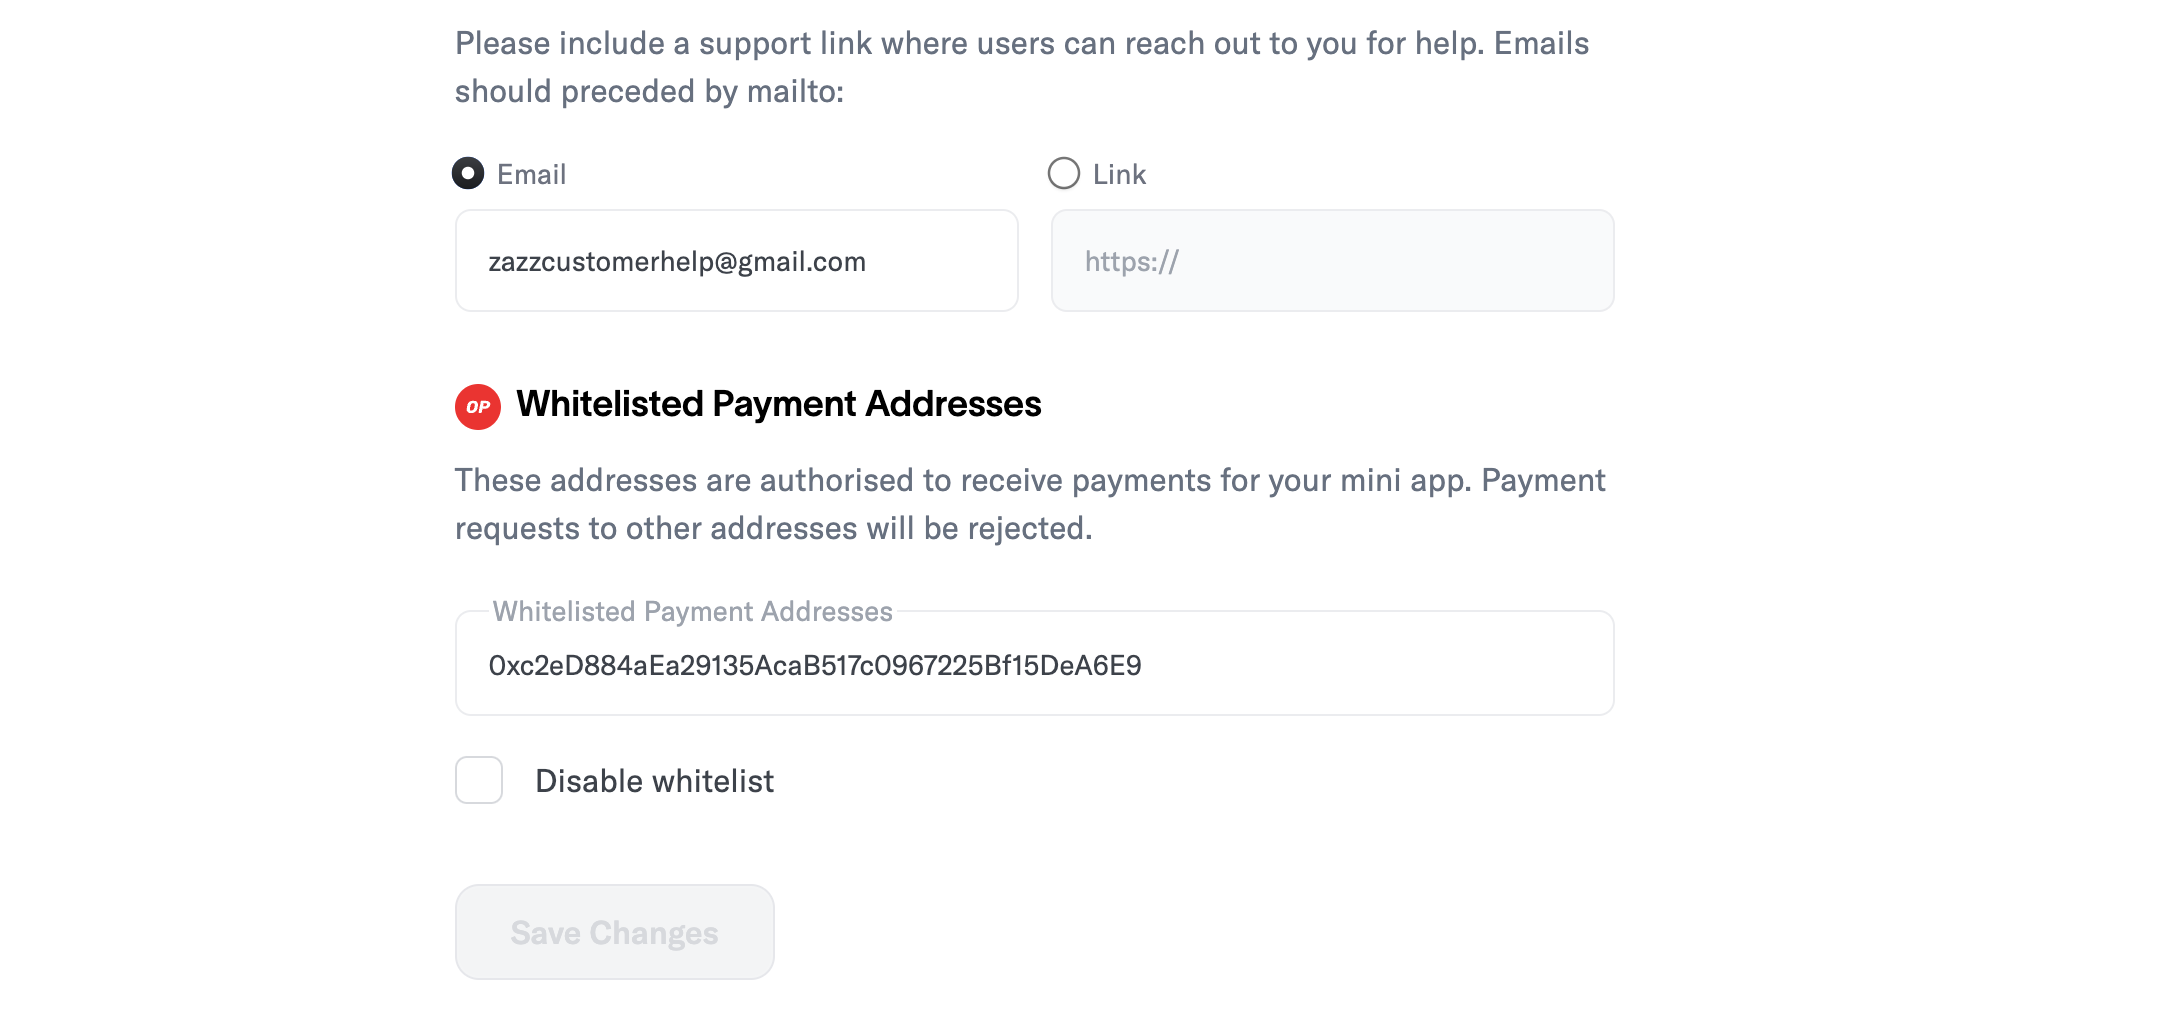
Payments are executed on-chain, so you'll need an Ethereum compatible wallet. Next, whitelist the address in the Developer Portal. Whitelisting adds security to your mini app to prevent payments from being sent to an unauthorized addresses. Optionally you can disable this check in the Developer Portal.
Initiating the payment
For security, it's important you initialize and store your payment operation in the backend.
app/api/initiate-pay/route.ts
import { NextRequest, NextResponse } from "next/server";

export async function POST(req: NextRequest) {
  const uuid = crypto.randomUUID().replace(/-/g, "");

  // TODO: Store the ID field in your database so you can verify the payment later

  return NextResponse.json({ id: uuid });
}
Sending the command
We currently support WLD and USDC payments. For now, payments will all be done on Optimism. Below is the expected input for the Pay command. Since World App sponsors the gas fee, there is a minimum transfer amount of $0.1 for all tokens.
PayCommandInput
export type TokensPayload = {
  symbol: Tokens;
  token_amount: string;
};

export type PayCommandInput = {
  reference: string;
  to: string;
  tokens: TokensPayload[];
  network?: Network; // Optional
  description: string;
};
Using the Pay command.
Note for convenience, we offer a public endpoint to query the current price of 1 WLD in various currencies detailed here.
app/page.tsx
import { MiniKit, tokenToDecimals, Tokens, PayCommandInput } from '@worldcoin/minikit-js'
    // ...
    const sendPayment = async () => {
      const res = await fetch('/api/initiate-payment', {
        method: 'POST'
      });
      const { id } = await res.json();

      const payload: PayCommandInput = {
        reference: id,
        to: "0xd8dA6BF26964aF9D7eEd9e03E53415D37aA96045", // Test address
        tokens: [
          {
            symbol: Tokens.WLD,
            token_amount: tokenToDecimals(1, Tokens.WLD).toString(),
          },
          {
            symbol: Tokens.USDCE,
            token_amount: tokenToDecimals(3, Tokens.USDCE).toString(),
          },
        ],
        description: "Test example payment for minikit",
      };

      if (MiniKit.isInstalled()) {
        MiniKit.commands.pay(payload);
      }
    };
Handling the response
Once World App receives the command, the user will be prompted to confirm the payment via a drawer. After that the app will send the payment to our relayer to be submitted on-chain. The response does not wait until the transaction is mined. Thus, it's critical to confirm the payment in your backend.
app/page.tsx
import { MiniKit, tokenToDecimals, Tokens, PayCommandInput, ResponseEvent } from '@worldcoin/minikit-js'
   useEffect(() => {
    if (!MiniKit.isInstalled()) {
      console.error("MiniKit is not installed");
      return;
    }

    MiniKit.subscribe(
      ResponseEvent.MiniAppPayment,
      async (response: MiniAppPaymentPayload) => {
        if (response.status == "success") {
          const res = await fetch(`/api/confirm-payment`, {
            method: "POST",
            headers: { "Content-Type": "application/json" },
            body: JSON.stringify(response),
          });
          const payment = await res.json();
          if (payment.success) {
            // Congrats your payment was successful!
          }
        }
      }
    );

    return () => {
      MiniKit.unsubscribe(ResponseEvent.MiniAppPayment);
    };
  }, []);
Verifying the payment
You should always verify the payment in your backend. Users can manipulate information in the frontend, so the response must be verified in a trusted environment.
Web2 applications can call our Developer Portal API to get the current status of the transaction. Since payments are executed on-chain, it can take up to a few minutes to confirm. You can choose to optimistically accept the payments once they've landed on-chain, or poll the endpoint to wait until it's successful mined.
Web3 applications can choose to search the on-chain event logs temselves via the TransferReference event emitted on-chain.
Note for reference ID the value on chain will be the keccak256 hash of the reference ID.
TransferReference
event TransferReference(
    address sender,
    address indexed recipient,
    uint256 amount,
    address token,
    string indexed referenceId,
    bool indexed success
);
In this example, we will show querying via Developer Portal API.
app/confirm-payment/route.ts
import { MiniAppPaymentSuccessPayload } from "@worldcoin/minikit-js";
import { NextRequest, NextResponse } from "next/server";

interface IRequestPayload {
  payload: MiniAppPaymentSuccessPayload;
}

export async function POST(req: NextRequest) {
  const { payload } = (await req.json()) as IRequestPayload;

  // IMPORTANT: Here we should fetch the reference you created in /initiate-payment to ensure the transaction we are verifying is the same one we initiated
  const reference = getReferenceFromDB()

  // 1. Check that the transaction we received from the mini app is the same one we sent
  if (payload.reference === reference) {
    const response = await fetch(
      `https://developer.worldcoin.org/api/v2/minikit/transaction/${payload.transaction_id}?app_id=${process.env.APP_ID}`,
      {
        method: "GET",
        headers: {
          Authorization: `Bearer ${process.env.DEV_PORTAL_API_KEY}`,
        },
      }
    );
    const transaction = await response.json();

    // 2. Here we optimistically confirm the transaction.
    // Otherwise, you can poll until the status == mined
    if (transaction.reference == reference && transaction.status != "failed") {
      return NextResponse.json({ success: true });
    } else {
      return NextResponse.json({ success: false });
    }
  }
}